Fuel filters are an essential part of a vehicle’s engine, preventing dirt from entering the engine, which causes the engine to have a long life span. Fuel filters can either be nylon/paper-like or made of metal. Nylon fuel filters are replaced with a new one while the metal fuel filters can be cleaned and used again.
A dirty fuel filter makes the fuel pump work harder and less efficient because of the strains. Currently, some cars have external fuel filters while others still use internal ones. If the fuel filters are damaged or clogged, it is advisable to replace them as soon as possible to avoid engine damage.
How to tell if your fuel filter bad on 06 Jetta TDI
- When it’s hard to start the car
The car may experience bad starting when the fuel filter is dirty, and this is because the fuel system flow is restricted, which makes it inconsistent.
- Damaged fuel pump
A restricted fuel filter may cause damage to the fuel pump. The force applied to the fuel pump prevents enough fuel in the fuel tank from reaching the engine, a situation that can cause damage.
- Engine performance problems
When the fuel filter is highly damaged, it affects the engine performance. To begin with, it can cause misfires, which happen under heavier loads when the particles block the filter and block the fuel from reaching the engine.
Again, a clogged fuel filter causes the stalling of the engine. Overloading that engine may cause it to stop running shortly after starting the car.
A dirty fuel filter can also cause a decrease in power and acceleration due to a lack of enough fuel supply in the engine. Therefore, the fuel pump works harder to supply the fuel to the engine causing slow and insufficient drive.
- Failure of some parts of the fuel system.
Some parts of the fuel system may fail due to the clogged fuel filter. The restricted fuel filter can also cause leakage to the fuel injector.
- Illuminating the Check Engine light
When the engine has issues, the check engine light appears on the dash to alert the driver. For example, a restricted fuel filter will cause low pressure to the system, which the sensor will detect, and the driver gets alerted by the light.
How to remove and clean a fuel filter
Tools required
The following tools are necessary when cleaning car fuel filters.
- Open-end wrenches
- Screwdrivers
- Rags or old towels
- Gloves
- Safety glasses
- Carjack
The fuel is flammable, so you should not have any ignition material during the process.
The fuel filter can be cleaned or replaced through some simple steps. First, you need to disconnect the battery and soothe the pressure in the fuel system. Take out the filter from the fuel lines and then sprinkle it with a solvent cleaner. Dry the filter for about an hour and then replace it. Place back your battery and run the engine to check if it’s working effectively.
Steps
- Remove the pressure inside the fuel system, and this is done by removing the fuel pump and leaving the engine started for a few minutes. The fuel will flow out, showing that the pressure is relieved.
- Using a wrench, disengage the battery’s negative terminal. Remove the cable from the negative terminal of the battery when the car is off. In case you fail to disconnect the battery, the sparks 8pronduced may ignite the gas fumes.
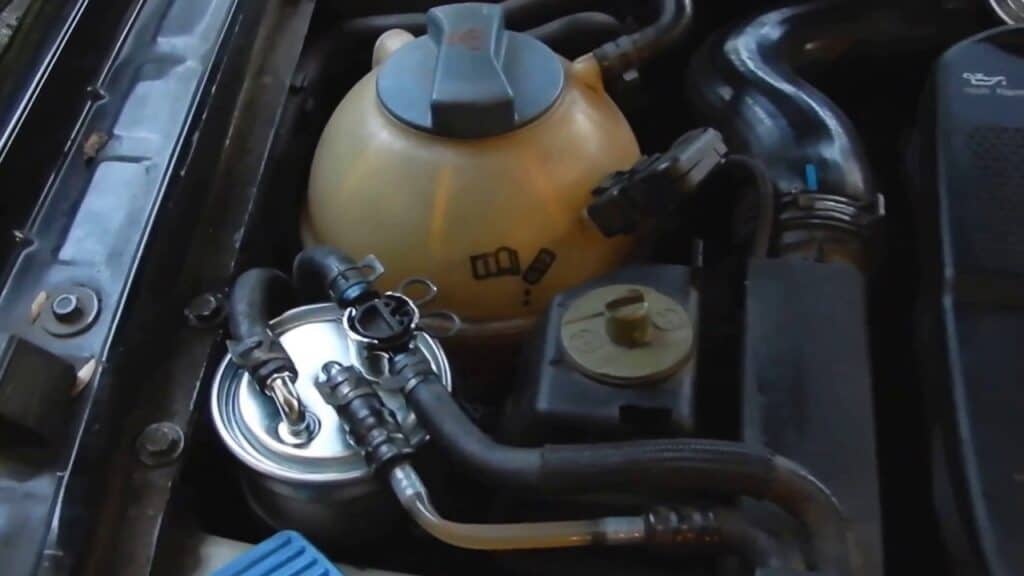
- Find the fuel filter. The fuel filter locations differ depending on the car model. It is always found between the engine and the gas tank.
- If necessary, jack up your car. Afterward, place a tin or a jar under the filter to collect the fuel that may spill out after removing the fuel lines.
- Use a screwdriver to loosen the clips. Afterward, fasten the fuel line to the filter.
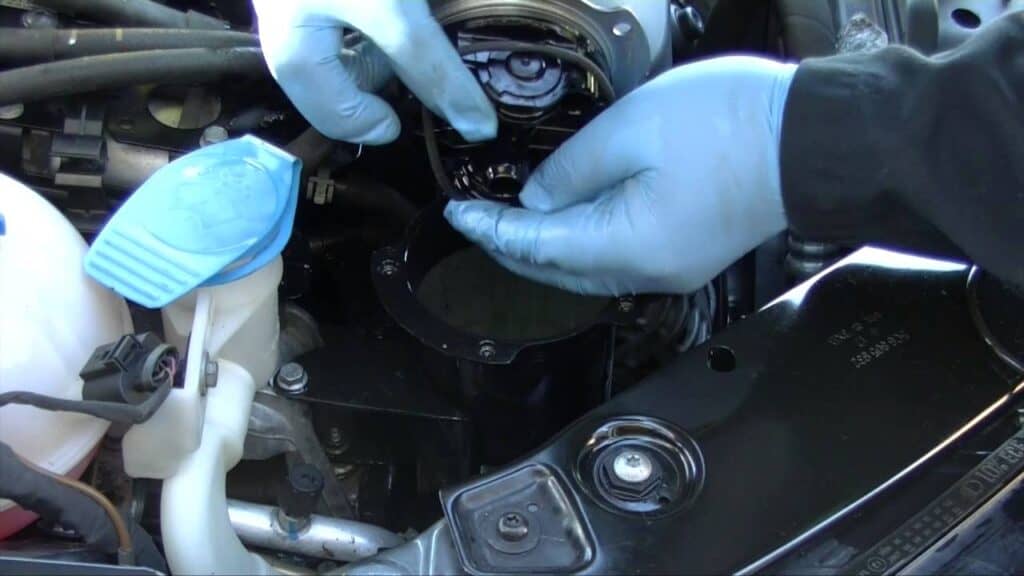
- Remove the fuel lines. Use gloves when removing the fuel lines, and also wear protective eyewear because the gas may drip.
- Remove the filter. Some cars do not have bolts holding the filter, so all you need is to slide the filter out and make sure you know its proper position where you will return it.
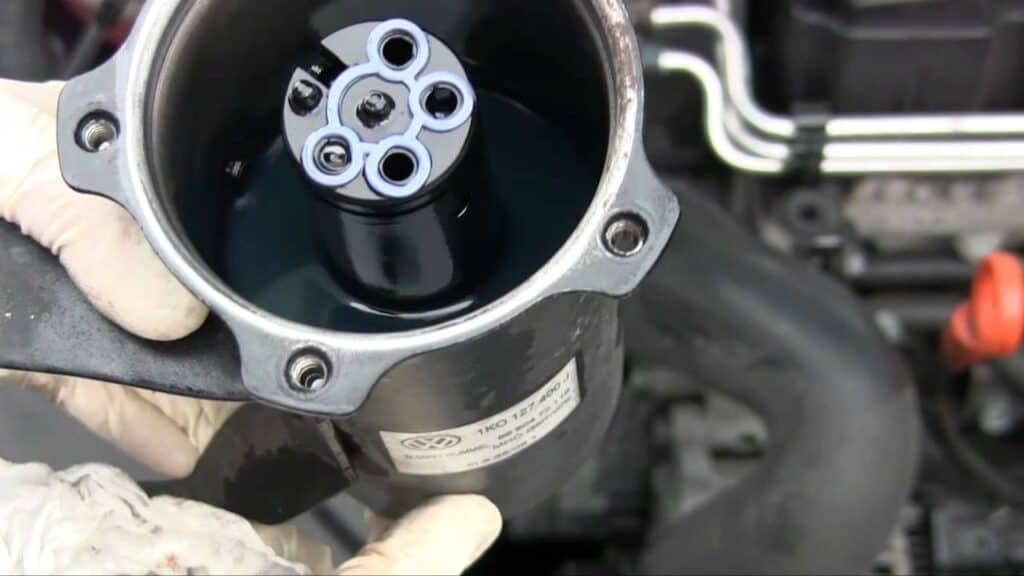
- Remove any gas remaining in the filter. Spout the fuel in and the fuel out nozzles located at each end of the filter to remove the residual gas in the filter.
- Spray the filter with a solvent cleaner to ensure that you don’t physically or chemically damage the filter while cleaning. The pressurized solvent cleaner has a straw that helps to spray inside each nozzle.
- Dry the filter for about an hour. After spraying the nozzles, leave them for about an hour for them to dry. Afterward, return the filter to its’ position and also return the bolts that you had removed.
- Slide back the fuel lines and clips. Ensure that the fuel lines are tight to prevent leakages.
- Reconnect the fuse and the battery. Connect the negative terminal of the battery to the fuse using the wrench.
- Start the car engine to test whether everything is fixed ri8ght and that there are no leakages. In case of any leakages, disconnect the battery and the fuse and then tighten the fuel lines.in case the engine fails to start, recheck the fuses for any lost connections
Conclusion
Driving a car without replacing the fuel filter can cause damage to the fueling system of the car and hence the non-function of the entire car since the car won’t move without the supply of the fuel to the engine.
The replacement of the fuel filter should be done often after every 20,000 miles of drive or immediately after noticing some signs of damage to the car engine.
Changing or replacing the fuel engine improves the performance of the engine and the car mileage. Sometimes the fuel filter may fail to function, as usual. Luckily enough, the information above will guide you on how to fix the problem.